Pages

Showing posts with label Fabric Dyeing. Show all posts

Monday, 5 August 2013

Hand Dyed Scrap Quilt


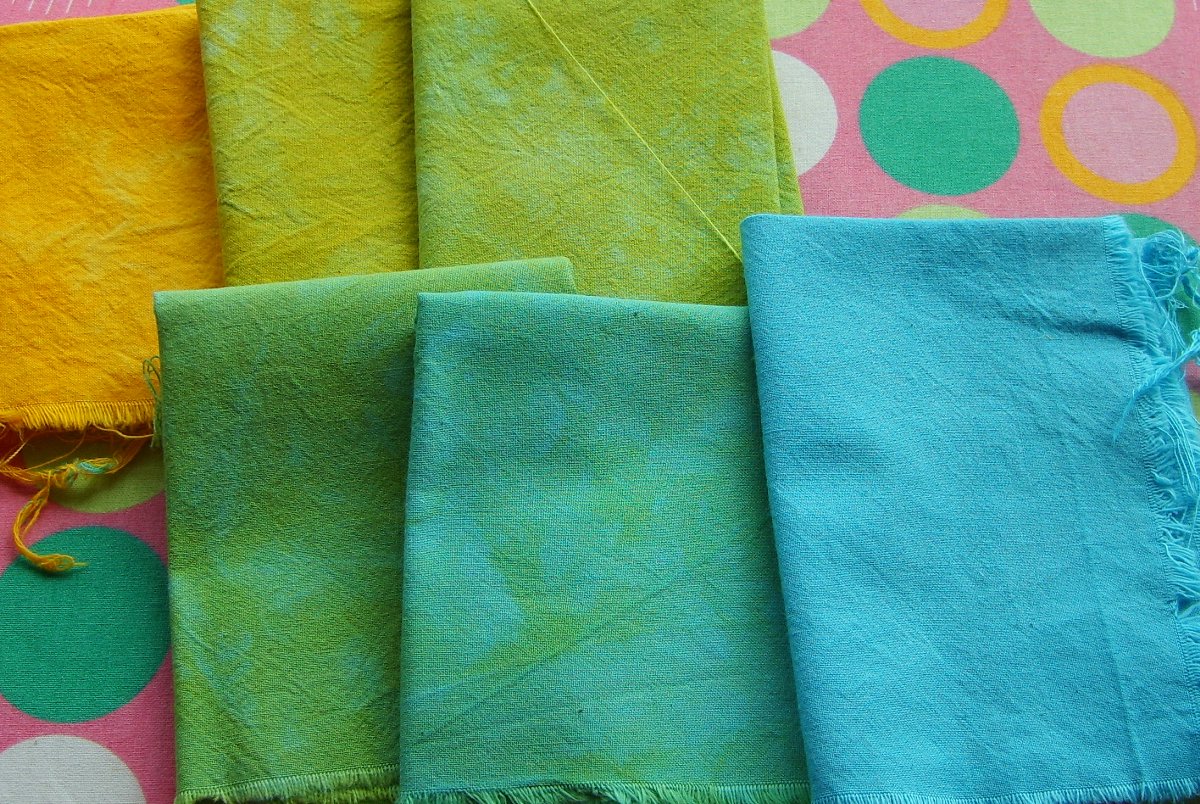
A couple of years ago I did some hand dyeing which turned out well.  It left me with a lot of cotton and calico samples.  I've been cutting them into 2.5" strips and have pieced them together.  It's a shame for them to lay in a drawer.  I thought Sparky would like some new quilts for his bed and these are just the job.

There's probably enough left to do a couple more when I'm in the mood.  I've used leftover wadding and zig zagged pieces together.  It's time I found a use for the wadding, it's so wasteful throwing it away.

Now to find a suitable backing.  I've definitely done some stash busting recently.


Thursday, 27 October 2011

Fusible Applique


Before

A while back I bought Laura Wasilowski's book "Fanciful Stitches - Colorful Quilts" and embarked on dyeing fabric to use with the ideas in this book and on other projects.  Here is a little quilt inspired by Laura's book.  

With some sort of new found confidence with free motion quilting - probably from Ferret's workshop yesterday, I decided not to hand embroider and popped it under the needle and painted away with variegated thread.  I made my usual mistake of going too close to the edges so I can't make anything with it - next time I'll leave borders.  It's OK for a practice piece.

After

Sunday, 10 July 2011

Embroidered Applique

In preparation for working on some Laura Wasilowski inspired designs using my hand dyed fabric this is a sample, post card sized piece of work using scraps from my stash.  It's been a project I've worked on in front of the TV - great carry around project


Sunday, 26 June 2011

Dyed Fabric - Results so Far


I can now say I have a stash of my own dyed fabric, there's getting on 50 pieces so I think it qualifies as a"Stash".
The photos were emailed and I can't seem to control what order they appear in the blog post so it's a bit of a scramble but I'll say what they are under each picture.


Above a two colour gradation from blue to cerise.


Above a one colour gradation of petrol green


Two colour gradation from golden yellow to turquoise - on calico


Spectacular results from folding, scrunching and squirting concentrated dye onto white cotton above and below.  These are my favourite pieces.


Above is a random mixture with a base colour of lemon yellow - leftovers from the gradation work has been dripped over the scrunched or folded yellow fabric.  I don't like to waste the leftovers and it's exciting waiting for the results.  If they're bad they can just be dyed over again later.


Above pastel colours from the first attempts at mixing the dyes.


Above - stronger jewel-like colours on white on white fabric.


A four step gradation of turquoise


A four step gradation of yellow.

I wish I could get my camera to capture the true colours, they really are much stronger and vibrant in real life than these pictures show.  My digital photography skills are still a work in progress.

Sunday, 19 June 2011

More Dyeing


White on white fabric from Scarborough Sewing Centre dyed with Procion Petrol Green.  The white printed pattern doesn't take the dye so it gives an interesting effect.


Gradations of turquoise on cotton lawn.


Gradations of turquoise and lemon yellow on cotton lawn.

In the pots at the moment are gradations of cerise through to blue and several pieces of fabric which have been random dyed with leftovers from the gradation pots - I can't wait to see how these come out.  The colours look so rich when they are wet, hope they don't wash out too pale as they dry.  More on that later......

Sunday, 12 June 2011

Dyeing - Part 3

A two colour gradation from Turquoise to Golden Yellow.  Here they are after the final wash, but not yet dry.  The colours will pale some as they dry.

I used one cup of water in each container and then added the amounts of pre mixed dye to each cup.  A piece of soda soaked calico and soda soaked poplin went into each container, just pushed down, not mixed around.  Hoping to achieve a textured appearance by not stirring everything around.  The fabric remained in the dye for approximately 18 hours, then rinsed in cold water, again in the washing machine followed by a warm wash with Ariel colour liquid.

The pre-mixed dye was 1.5 tsp to 1cup + 1 tbsp of water.

Saturday, 11 June 2011

Dyeing - Part 2


Today's dyeing session consisted of some fabric shopping - I only found cotton poplin at £3.25 and it's not great but something to keep me going through the experimentations.  I have some samples from Whalleys in Bradford and if I decide that I really want to do more then I'll get some PFD fabric (prepared for dyeing) or whatever is suitable from them.

I've made up another gallon of soda ash solution and soaked the poplin and quilting fabric from Scarborough Sewing Centre.

Using my new book Fun Fast and Easy Fabric Dyeing by Lynn Koolish I have followed the instructions for doing a two colour gradation - the two colours being golden yellow and turquioise.  The photos show the 6 dye mixes and I already know that little can be known about the end result by looking at the colour of the mixed dye.  How it looks wet and then how it looks when it is dried and ironed can be very, very different.  This will be seen in a future post with photos of the fabrics I dyed yesterday.

It's a bit messy but I'm enjoying playing around with it all in the summer house.  I've had two major spills and it doesn't matter in there.  Great place to work when it's not too cold.

I did try to upload the photos in order showing the gradation from Golden Yellow to Turquoise but they haven't appeared in order.  It's too time consuming to try and rearrange them so I'll leave them as they are..

Friday, 10 June 2011

Dyeing - Part !


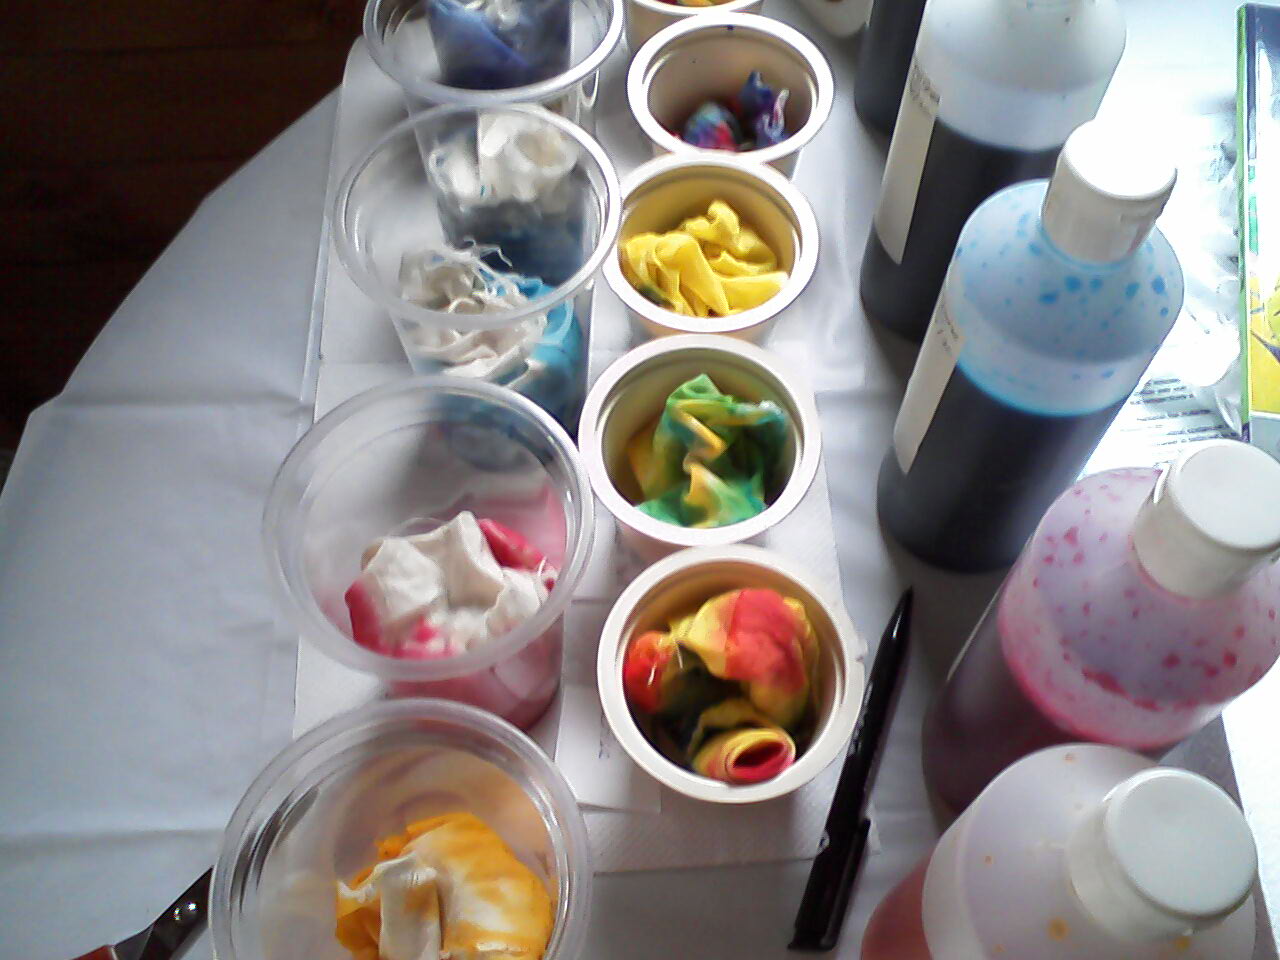
I have six colours in my Dye kit and using the bottles purchased on Ebay I've mixed up a medium strength of each.  Using dry calico which has been pre-soaked in soda ash each piece of fabric was scrunched, knotted, twisted or rolled into small containers and various combinations of coloured dye poured and / or squirted upon


Everything was left for more than 2 hours before being squeezed out and dipped into cold water and now it's drying - can't wait to see how it turns out.

Thursday, 2 June 2011

Getting Ready to Dye

+

Metal measuring spoons


Procion MX Starter Kit from www.kemtex.co.uk 


Funnel, dust mask, plastic containers


3 gallon bucket on a plastic, protective tablecloth.


Soda ash, otherwise know as sodium carbonate or washing soda.


The book I'm relying on to show me how it's done.

Lots of bits of calico have been soaked for 20 minutes in soda ash and hung out to dry.  Tomorrow will be spent playing with colour, mixing dye and and applying it to fabric.  Fingers crossed I will soon have some bright fabric to try out some of Laura Wasilowski's patterns.